
Hello my wonderful friends! You are never going to guess why I’ve been blissfully happy so I’ll just tell you. Remember all the times I’ve groused over our stone mantel? Grumbled that it was uneven and trying to balance things on it was like putting socks on a rooster? Well, as a gift, the Mister built a mantel to cover our whompyjawed stone mantel! Aaaahhhh!!! Do you want to know how he built it? Alrighty. Here’s how to easily build a wooden mantel surround.
How to Easily Build a Wooden Mantel Surround
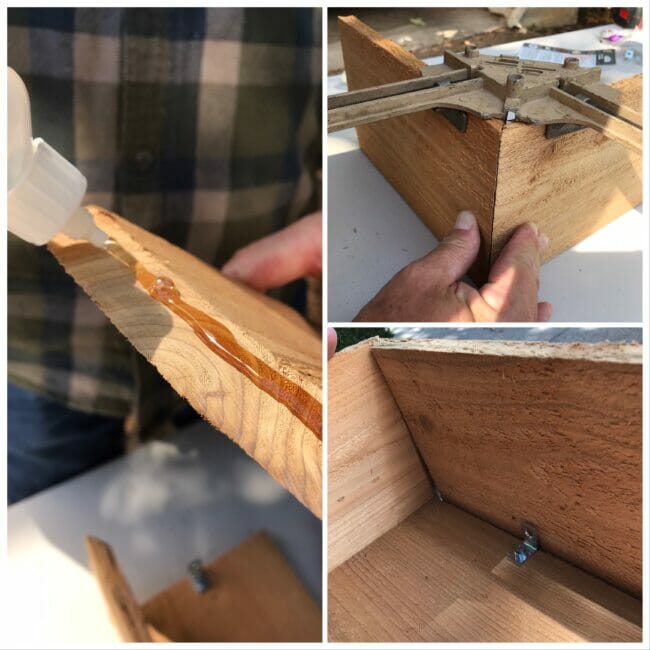
 Measuring the fence pickets and mitering the sides
 Measuring the fence pickets and mitering the sides
I looked at it empty for several days. Just admiring that it was there. It’s the perfect color for us because it matches the wood floors, it’s just the right amount of rustic and it cost less than $40 bucks to make! That’s my kind of gift. It could be that I’ve waited 10 years for it but so far, it’s been the second best thing about 2020. The first was our road trip.
Supplies: Enough fence pickets for the size you want (we used 3), wood glue, “L” brackets and screws to fit the thickness of wood, drill, masonry bit and concrete anchors, (clamps optional).
Gluing and clamping edges together then adding “L” brackets
 Gluing and clamping edges together then adding “L” brackets
Steps to build the mantel surround
Note: The reason the mantel cost less than $40 was because we used left over fence pickets but they are very inexpensive so it won’t cost more than $40 anyway.
Step 1: Measure the size you need to cover the existing mantel. In our case, I chose 64″ wide and 10″ deep to have plenty of decorating room.
Step 2: Choose your fence pickets (or wood pieces) and cut them with a Miter Saw so the edges look like the finished corners of a well built frame. This wasn’t listed in the supplies because you don’t need it. Only if you want mitered corners. You can leave it in box form.
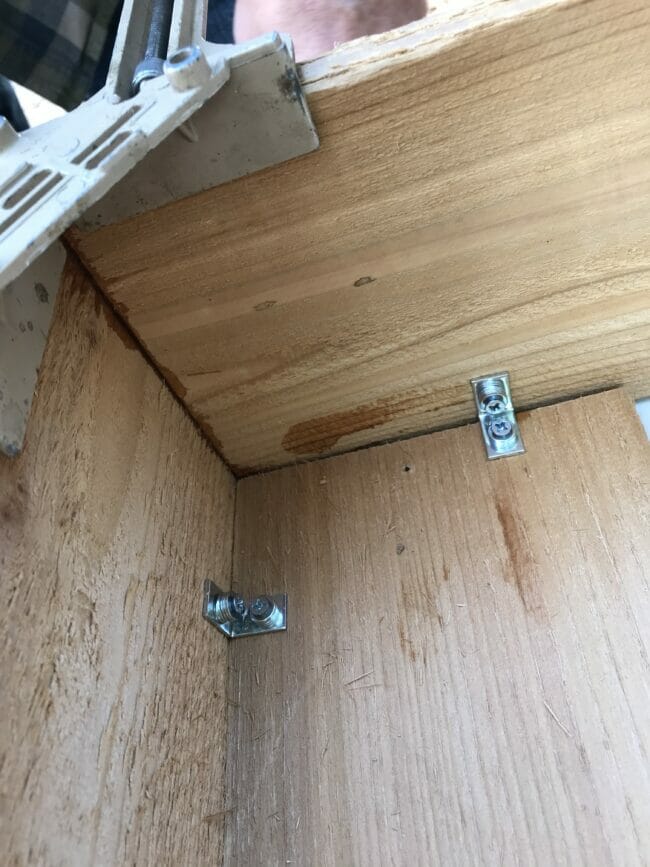
 Adding “L” brackets with extra washers
 Adding “L” brackets with extra washers
Step 3: Fit the edges together and use a clamp to line up the edges. If you don’t have clamps, it’s okay. You’ll just need a few more hands while putting it together. Once you’ve lined them up, add a small bead of Gorilla Glue but not so much that it squishes out from the sides. That would stain the wood.
Step 4: Choose where you want the “L” brackets and screw them in. The brackets pull the wood pieces nice and tight and of course holds it together. We placed the brackets at the ends of the box and about every 20″ apart on the rest. We wanted to use a larger diameter screw and they didn’t come in the size we needed so we improvised and used extra washers so the screw wouldn’t go through the wood pickets.

Step 5: Once the “L” brackets are all installed we removed the clamps and added a bead of glue to the inside of the box along each edge. The glue isn’t absolutely necessary but adds a little more strength. Depending on the glue you use, check to see how long it needs to dry. We left the Gorilla glue sit for 24 hours. We put the base and sides together on day 1 and added the top on day 2 then let that glue dry 24 hours as well.
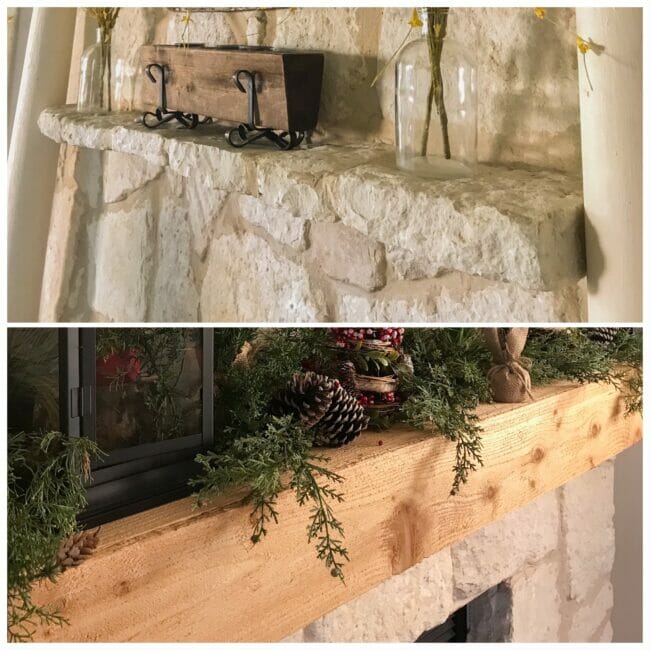
Before and After Stone Mantel
 Before and After Stone Mantel
Finished mantel attached to existing stone mantel
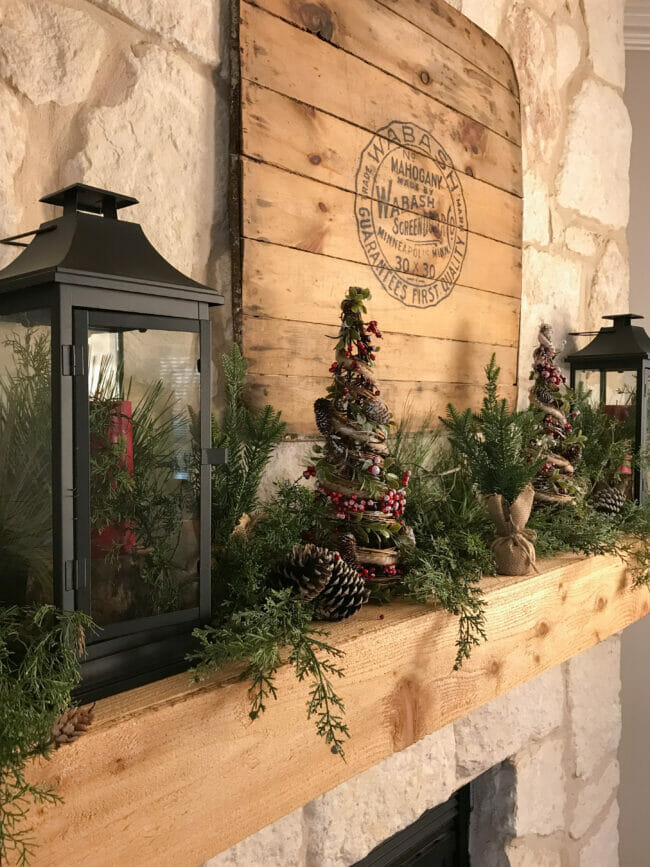 Finished mantel attached to existing stone mantel
Step 6: After the glue sat for 24 hours, we placed it over the stone mantel and screwed it in from the top. I was so excited to help get it up that I forgot to take a photo of that. Sorry! We used a regular bit to drill through the wood mantel and just enough to scar/make a mark on the stone so we’d know where to drill the holes into the stone using a Tapcon masonry bit.
After that was done, we simply put the mantel back on and lined up the holes. To secure the wood mantel to the stone mantel underneath, we used Tapcon concrete anchors. If you have a hammer drill, it will work easier but a regular drill works just fine. You can sand and seal it but I liked it rough and wanted a more rustic finish.
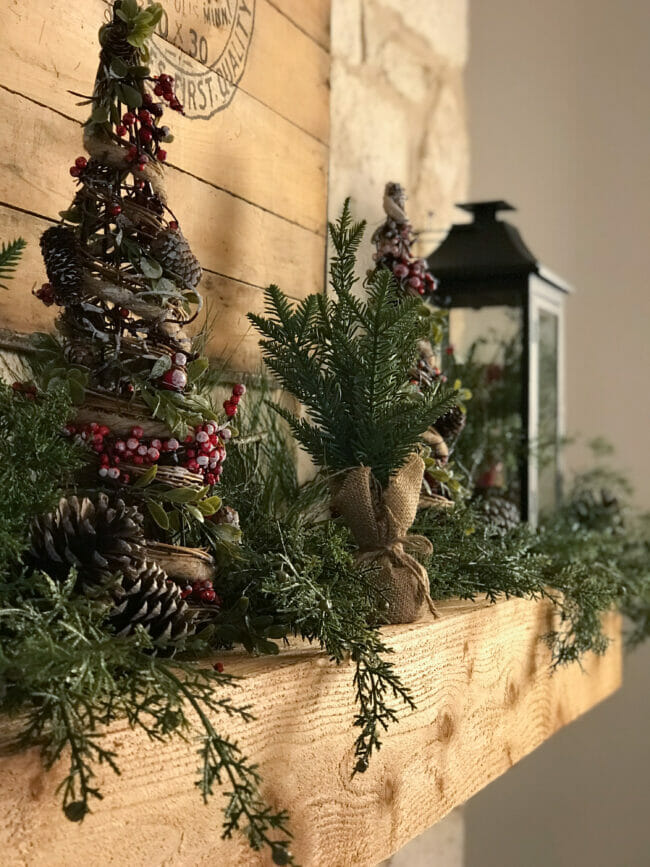
Voila! Now you know how to easily build a wooden mantel surround!
I sit on the sofa and probably look a little goofy because I’m staring at a mantel with a giant grin on my face. No judging! If you’d waited for 10 years for a proper mantel, you’d be grinning too. Looks like my rustic woodsy Montana Christmas theme is going to be fabulous and look nice with my easy rustic Christmas jar decor! Yep, happy wife, happy life. 😉


Cindy,
This looks wonderful! Great job.
Author
Thanks so much Rachel, I am over-the-moon excited!
Would love to see the whole fireplace with the new mantel….such a great idea.
Author
I will do that soon Karen. I was in a rush to get these out and I was short on time. Now that I have it, you might get sick of looking at it! 😉
I know how annoying things can be so I am very happy for you!!! It looks great!! Good husband ❤
Author
He’s a keeper for sure. I can hardly wait to change it up I know that sounds ridiculous but it’s true. 🙂
That turned out fabulous, and I am so happy that you finally got it!
Author
Woo hoo! Me too Miche. Thanks so much!
This is perfect Cindy!!! And I love how you have it decorated for Christmas!
Author
Thank you Michelle. I’m starting my woodsy Montana Christmas decorating around here but having to restrain myself from so many greenery stems! It can look like a jungle in here real quick because I love them. Not quite the same look or continent! LOL!
I love it, i would be smiling every time i looked at it too, it really is beautiful and goes perfectly with your stone fireplace.
Author
Yay, you get it! Thank you Marlene. I think so too.
Gorgeous, your husband did a fabulous job! I’m leaning towards a woodsy Christmas as well, purged a lot of my decor and going simple and classic with more natural elements. Thanks for sharing!
Author
Sounds like we both are going to have beautiful homes for Christmas this year. Love it! Thanks so much for commenting and I’ll tell the hubs you said he did a fabulous job. 🙂
Love your new mantle. Such an improvement. Love the Christmas. Love that man. I lost mine 2 years ago. He was always doing things for me.
Love Texas,
Nell
Author
I’m sorry Nell. Thank you for sharing that. Makes me more grateful for having the Mister around to do things because I take him for granted way to many times. Big hugs and hope you have a wonderful Thanksgiving!
It’s lovely, Cindy! I think it looks perfect! How will you clean it when it is unfinished? A vacuum? (All I keep thinking about is wiping it with a cloth and I get the heeby-jeebies.) And don’t say something like, “Clean it? The dust will just make it more rustic!” because I know you won’t want dust to show in pics! LOL!
Author
LOL, I was thinking the other day that those little Swiffer things are going to snag and do me no good. So yep, I plan to use the brush attachment on the vacuum. Although sadly, I’ve had dust in my photos before. Oops, my bad. HAHAHAHA!
I’m with Julie. I have “rustic” beams in my bedroom with little tufts of my purple static duster stuck in the splinters! I’ve turned into a crafter rather than a housekeeper! DUST is a 4-letter word! But it is harmless! Your new mantle is beautiful and I agree that that husband is a keeper; please give him a big hug from all of us!
Author
LOL Kathy, I can see those little purple pieces now just waving at you when the air turns on. I’ve told my hubs before that I don’t like dusting because I’m allergic to dust. He doesn’t believe me but I’ll keep him anyway. He’s pretty handy. 😉
It turned out so good Cindy! I’m dreaming of a fireplace and a mantle. Maybe in our next home.
Author
Thank you Linda! Living in Texas we rarely use a fireplace. If my hubs wasn’t so cold all the time (during winter) I’d probably never flip the switch. Yep, we flip a switch even though I prefer the real deal. May we both get what we want next time around. 😉
Cindy, this is one of the best projects I’ve seen in a while, and I love the rustic looking wood with the rock. Your decorations look so pretty too! Pinning!
Author
Thanks Michelle. I am really excited about this years Montana Christmas theme. Especially now that I have a real mantel over the fireplace. Woo hoo!
Such an amazing transformation, Cindy! What a sweet gift. I’m in LOVE! He did such a good job. Pinning right now. Hugs and super exited for you, CoCo
Author
Thanks so much. We had looked for months for a new one already made but nothing was the right color or exactly what I wanted. Plus they were all over $250 and looked like fake wood – no thanks. Anyway, I’m super happy with it and can tell it’s going to be so fun to decorate!
I knew he was a keeper! He is so much like his dad. Always making something wonderful. I know how much you have wanted that mantle for so long, and it is fabulous. What a transformation! Good post, great mantle! I’ll be seeing it soon, and I’m looking forward to it.
Author
Well I’ll be happy to show it off! And yep, he’s a keeper.
Hi Cindy, I’m back to let you know I’m featuring your post this week on the Tuesday Turn About Link Party! Hope to see you there!
Author
I saw that, thank you! Always love looking at all the inspo on your party. 🙂
The wood surround takes it to a whole other level. Looks great!
Author
Doesn’t it?! I love it and will enjoy decorating it for years and years. Thank you Alexandra.