

Hello friends! Guess what. I have another no-sew project for you. I needed more pumpkins and didn’t want to fool with painting so I decided to make some instead. So here are my adorable DIY no sew fabric Pumpkins!
Adorable No Sew Fabric Pumpkins
I went to the craft store and picked up some white fabric. Actually it’s quilt batting. Didn’t know what that was until the lady at the checkout told me it wasn’t fabric and not on sale. No worries. I had a 40% off coupon. I have a feeling most of you know what batting is but I chose it because it was soft and it has a bumpy texture to it. Sort of like the skin on a pumpkin. How cute it that?! Well, you’ll see in the adorable DIY no sew fabric pumpkins tutorial!
No Sew Fabric Pumpkin – Supplies
This makes a 1 – 6″ to 7″ pumpkin
Fabric of choice ( a 15″ x 15″ square)
Twine or jute string
Stuffing (I used Poly-fil)
Dried beans or rice or small pebbles
Scissors
DIY Steps
Step 1: Cut your fabric into a 15″ square and a 6″ piece of twine (lay twine aside)
Step 2: Add a handful of beans to the center of the square
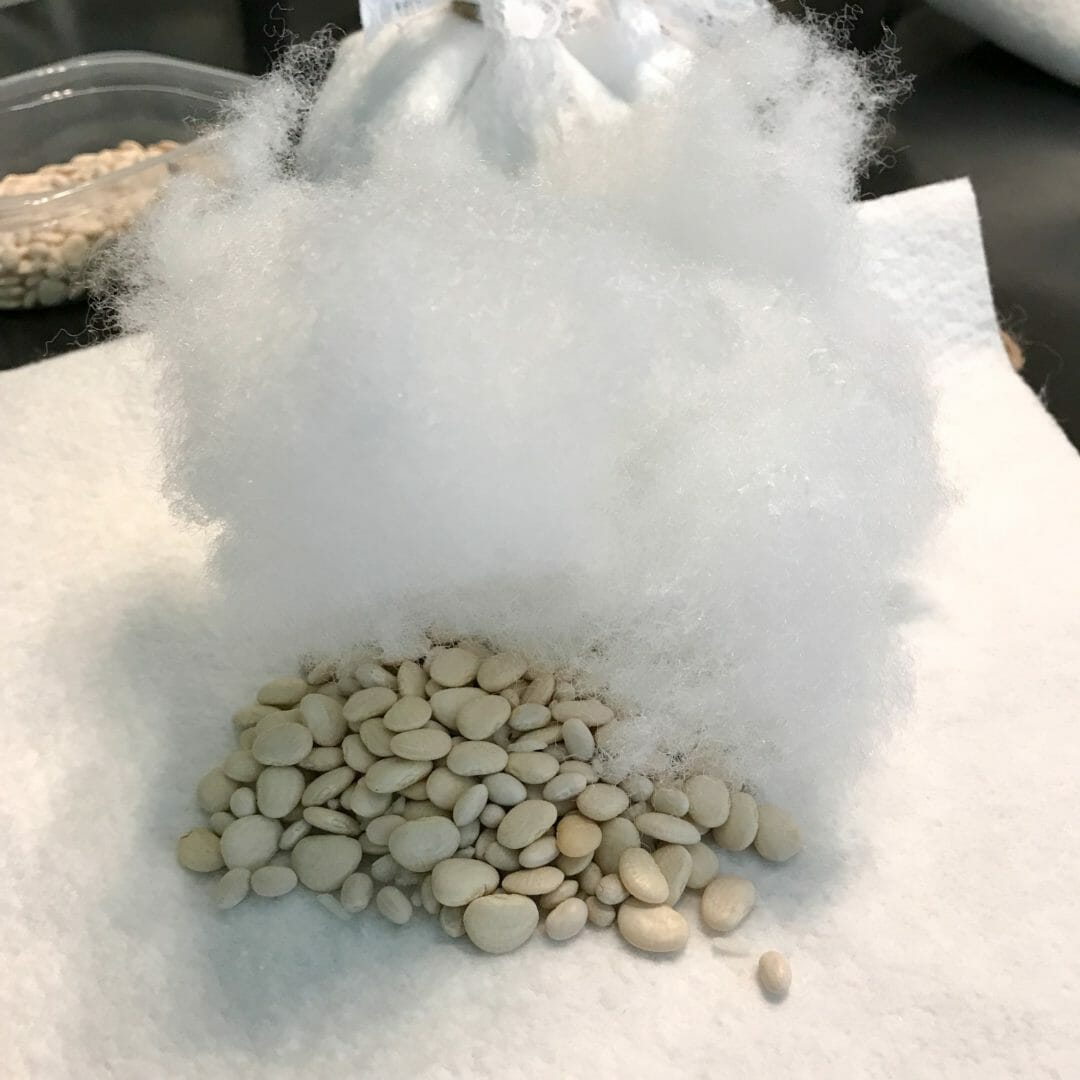
Step 3: Add 2 large handfuls of stuffing to get the shape and size you want.
Step 4: Gather the fabric like a baby diaper. I pulled the short sides together tucking them in then picked up the corners.
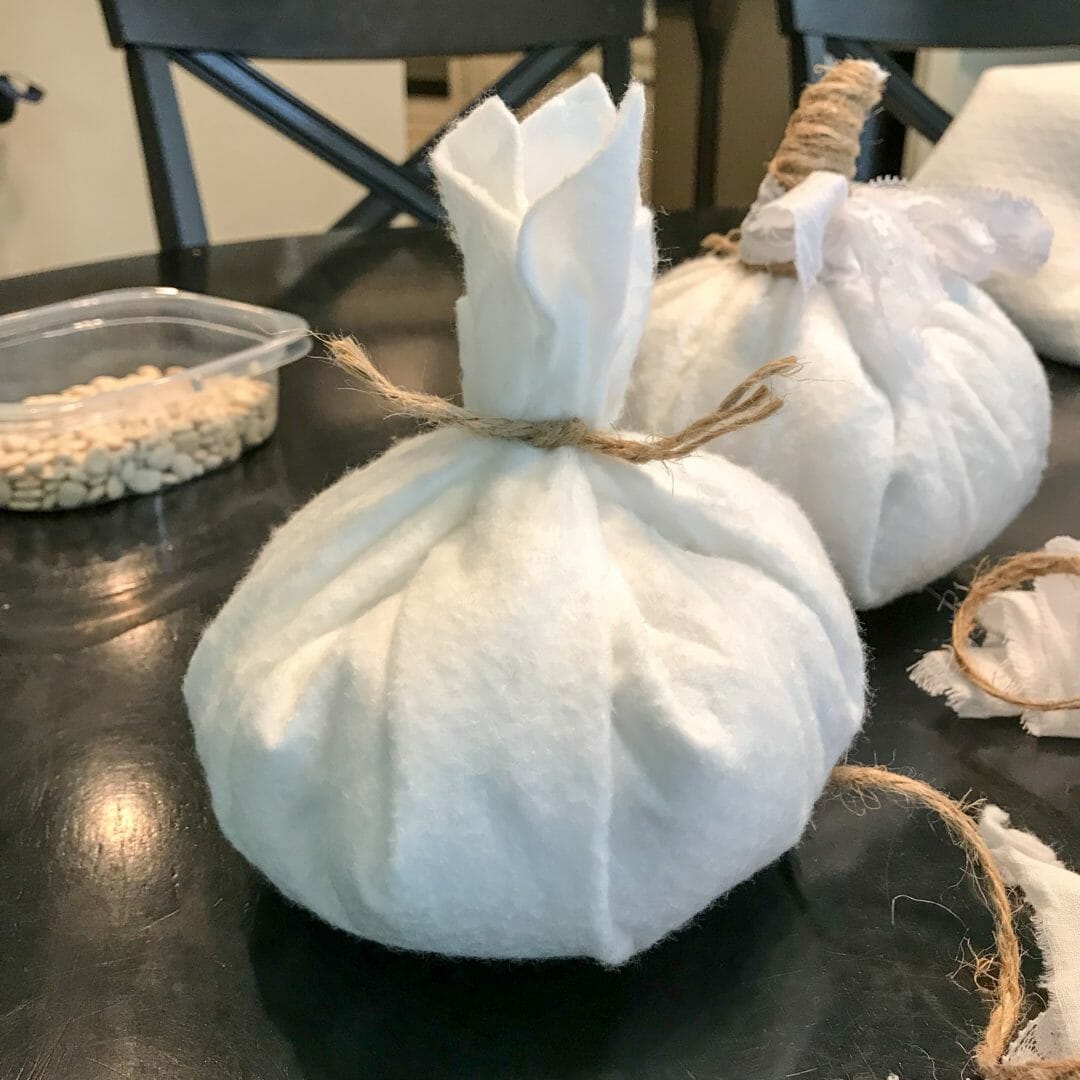
Step 5: Tie the 6″ piece of twine around the top of the pumpkin (the extra fabric you gathered) and secure with a knot.
Step 6:
Wrap more twine around the gathered fabric (stem) pulling it tightly with each pass. When you get to your desired height, wrap the twine around one more time taking it back to the bottom of the stem. You’ll tie the end of the twine to one of the strings left from the piece you secured it with when you gathered it the first time. Cut off any extra fabric sticking out of the stem. You don’t want to go all the way to the top or it will unravel.
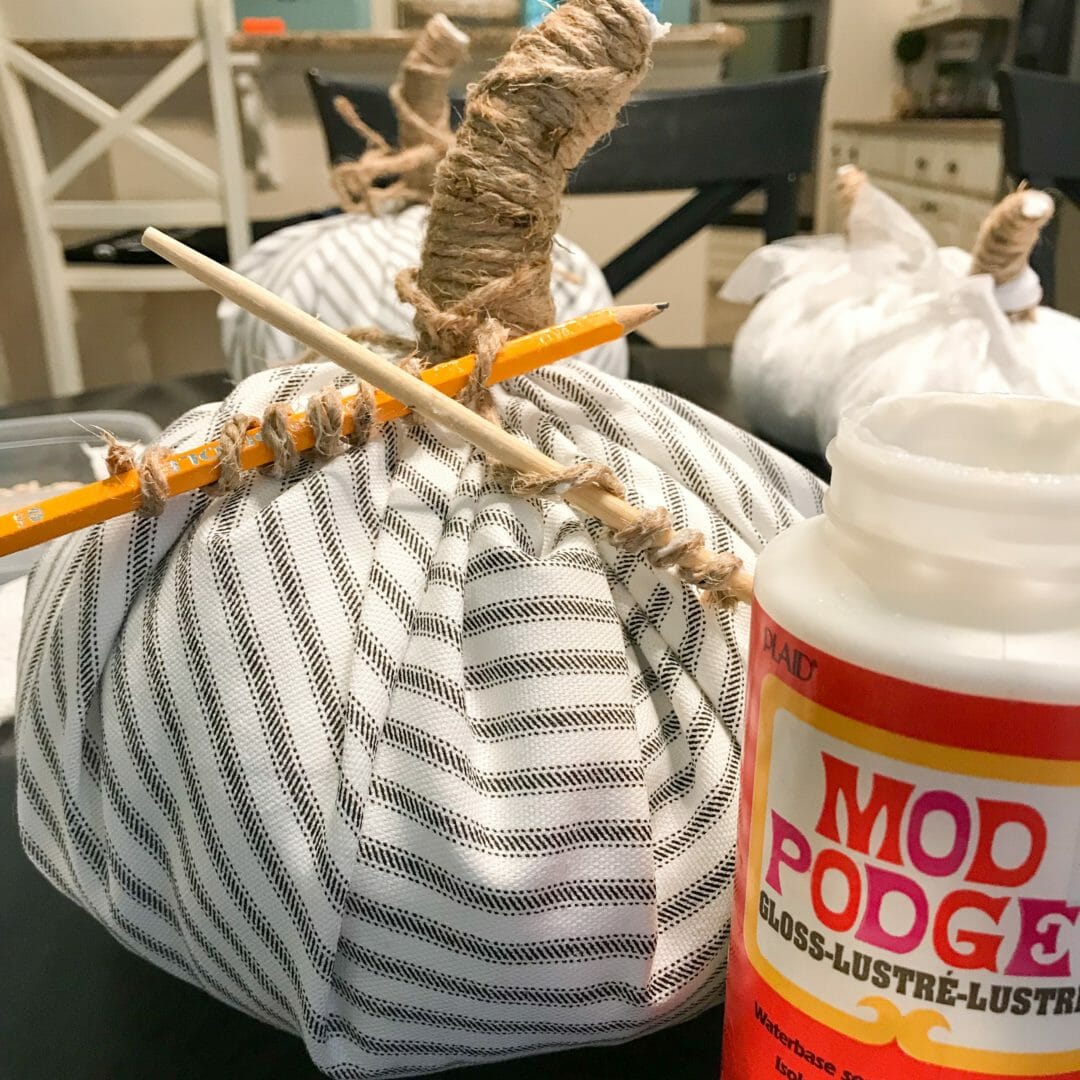
Step 7:
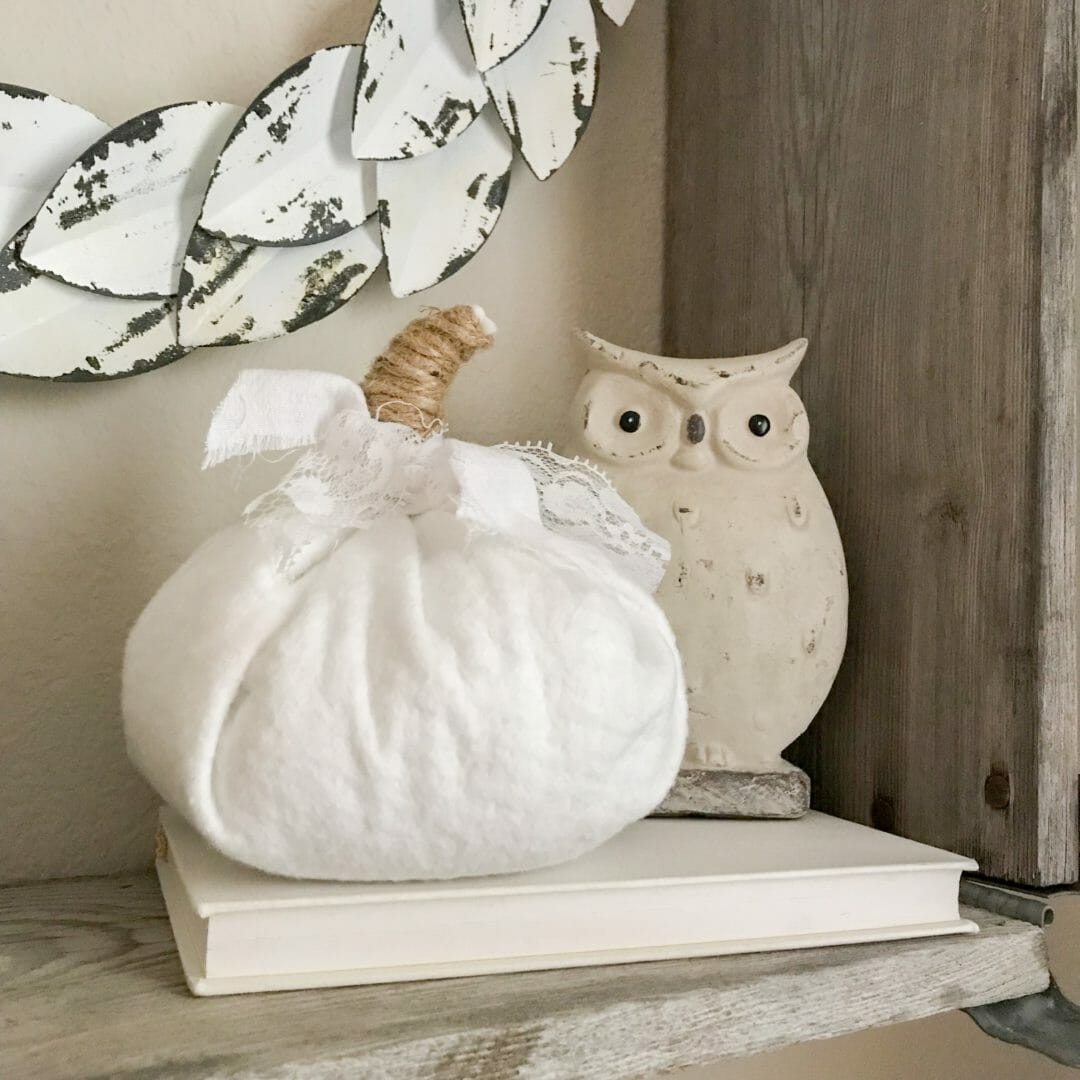
You can add ribbon or scrap fabric in any color to make leaves if you’d like. I added extra twine pieces on one of them to get a different look. To make the twine curl like vines, simply wet it with Mod Podge and wrap it around a pencil. Hold it there for about a minute. Then slip it off the pencil before it dries. If you wait until it dries, it sticks to the pencil. Don’t ask how I know that. :/
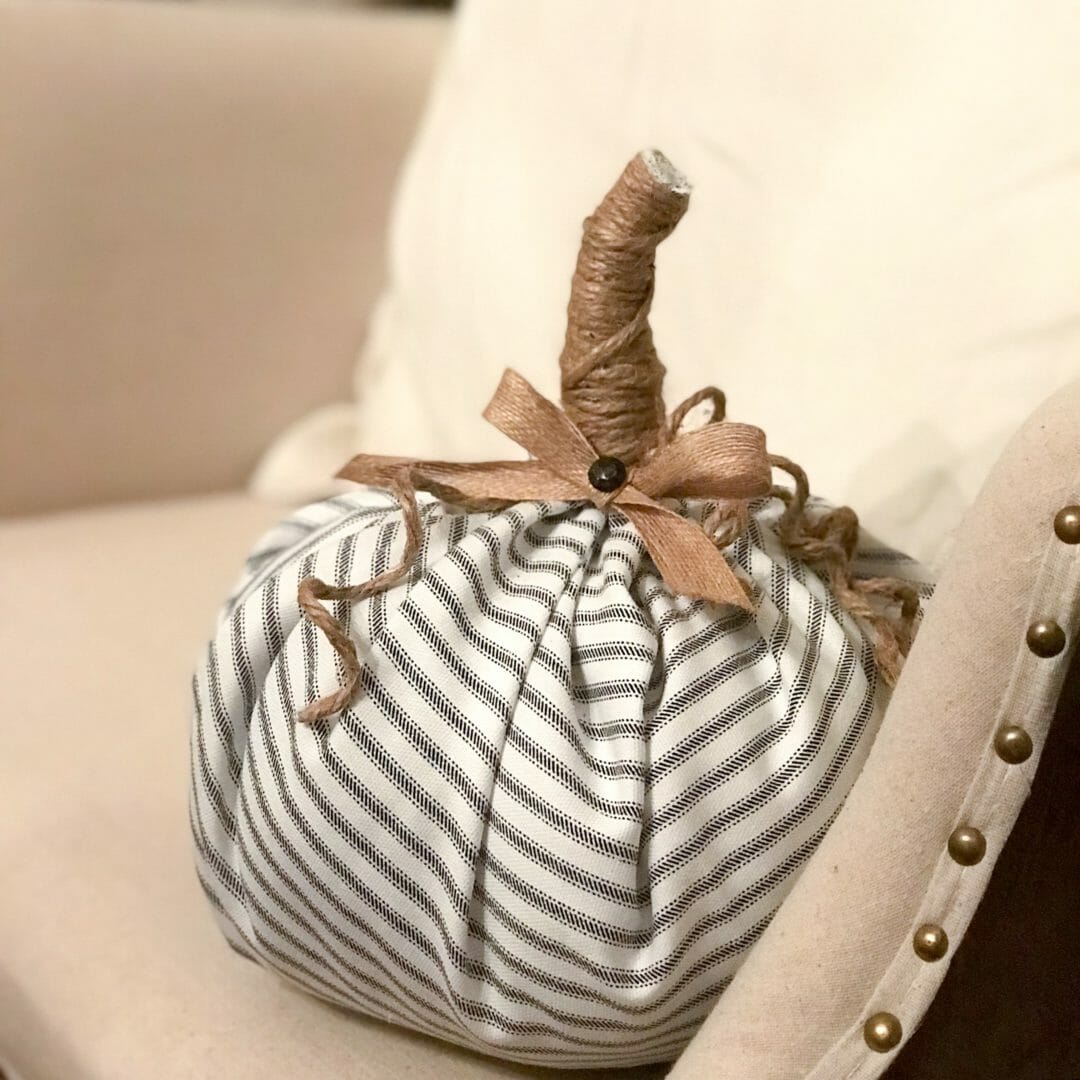
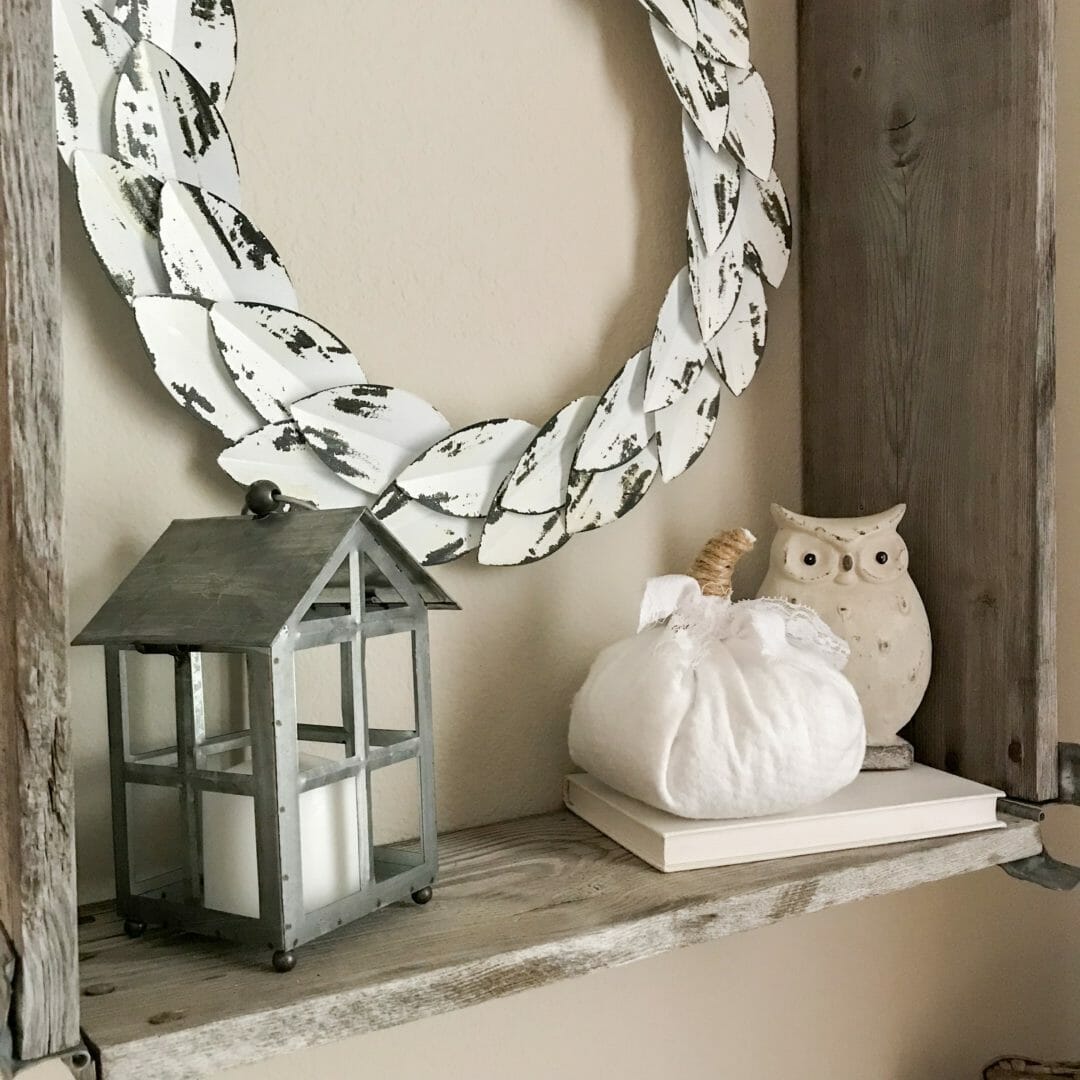
Aren’t those adorable DIY no sew fabric pumpkins?! I love how easy they were. Like 15 minutes easy and no paint clean up. I am going back to the craft store and getting more fabric in different textures and colors! I’m thinking Tweed, Felt or fuzzy Wool! Woo hoo!
I painted more than my share of pumpkins last year. They were vintage inspired and so beautiful. If you’d like to see that super easy tutorial, click here for that page. Enjoy!

Oh my gosh, such neat ideas!! Love each and every one! You have inspired me to look for ways I can incorporate some of your thrifty and stylish decor tips around my home. Best wishes!
Author
Woo hoo Dana! That makes my day. Happy crafting and DIYing!
I can attest to the fact that these are so cute because my wonderful sister-in-law gave me one. I am going to try to make some more! They would be adorable gifts!
Author
Thank you Melinda! Glad you like it. We could always get together and make more?! Enjoy. ❤️
Clever & fabulous! I love these!
Author
Thanks Laura! I love “clever AND fabulous !” 😀
Well… I know what I’m doing on this rainy Saturday! Thanks for the tute!!
Author
LOL. Wish I were in town, I’d invite myself over and make some more with you! Big hugs ❤️
OOO, these are sooo cute and I also read your post on painting one…So cute…
Excuse me now, I am on my way to Hobby Lobby…..
Author
LOL. Have fun at Hobby Lobby! They were a lot of fun to make. 😀.
The beans in the bottom is a good idea. So cute.
Author
Thanks Katie. Hope you have a great weekend. 🙂
I have already been to buy some fabric and i saw some pretty burgundy and black velvet, i wanted so bad but couldn’t think of a thing i needed it for til now, woohoo, i’m going back. It looks easy,thanks Cindy have a great weekend.
Author
Yay Marlene! I think velvet will be stunning! Maybe use black or brown velvet ribbon for the stem? Would love to see a picture when you’re finished. Have fun!
Super cute, Cindy!! You are inspiring me to try to make my own. What do I have stashed around here? 🙂
Author
I love using my stash of stuff. I feel all frugal and economically responsible. Or is that just a nice way of saying cheap and easy?! LOL. 😉
I think I might even be able to make one of these! Love it! Pinned.
Author
Yes, do it! I’m hooked and plan to make a couple more. Maybe HUGE ones for my porch urns. Yippee!