

Hello! Some of y’all know I’m in the process of redoing our dining room. If you want to see the hideousness of it and a little inspiration, click here. It’s taking way longer than anticipated. Busy life gets in the way, then the Mister goes out of town, then it rains and I can’t paint, blah blah. I feel it’s always something. Well I finally got the table painted! Some of you are gasping at the thought of painting a wood table and have mentioned it’s just foolishness. Then some said go for it and that’s all the confirmation I needed, so I did! LOL. In addition, here’s a paint review too.
I Finally Got The Table Painted!
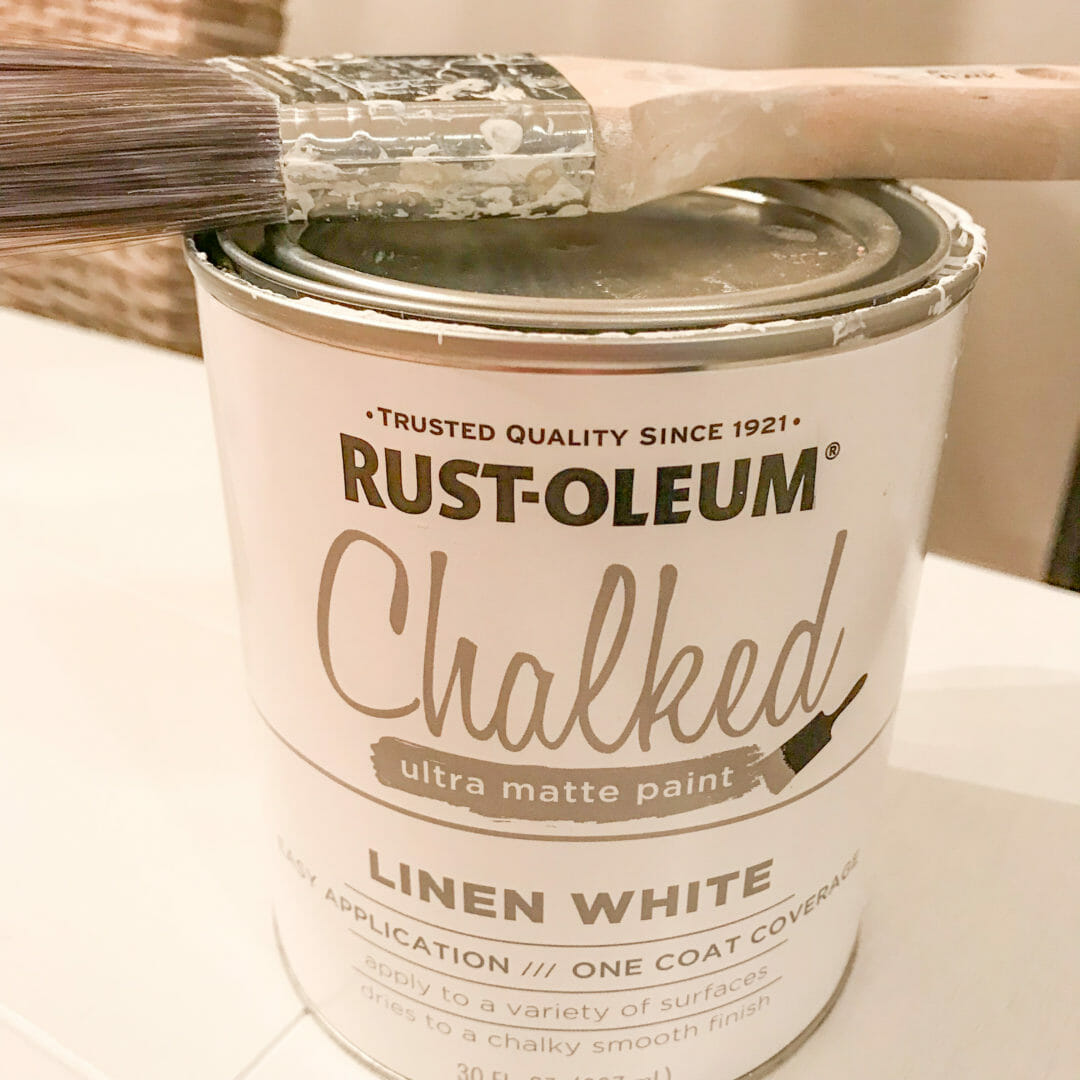
And a review of Rust-oleum “Chalked” ultra matte paint.
I like the wood looking table with its twisted legs but it had a little water damage plus the table top is a wood veneer anyway. And being on a budget painting seemed to be the most economical idea.

First step was to clean the table.
I wiped down the entire table with a liquid deglosser to get any possible oil off. I think that is a good idea even if the paint says there’s no need to prime. I’ve used Annie Sloan Chalk paint many times and like it but it’s expensive. This time I’ve decided to try the Rust-oleum brand. So here’s my 2 cents and no this isn’t a sponsored post even though I totally wish it were. Hello, who doesn’t want free paint?!
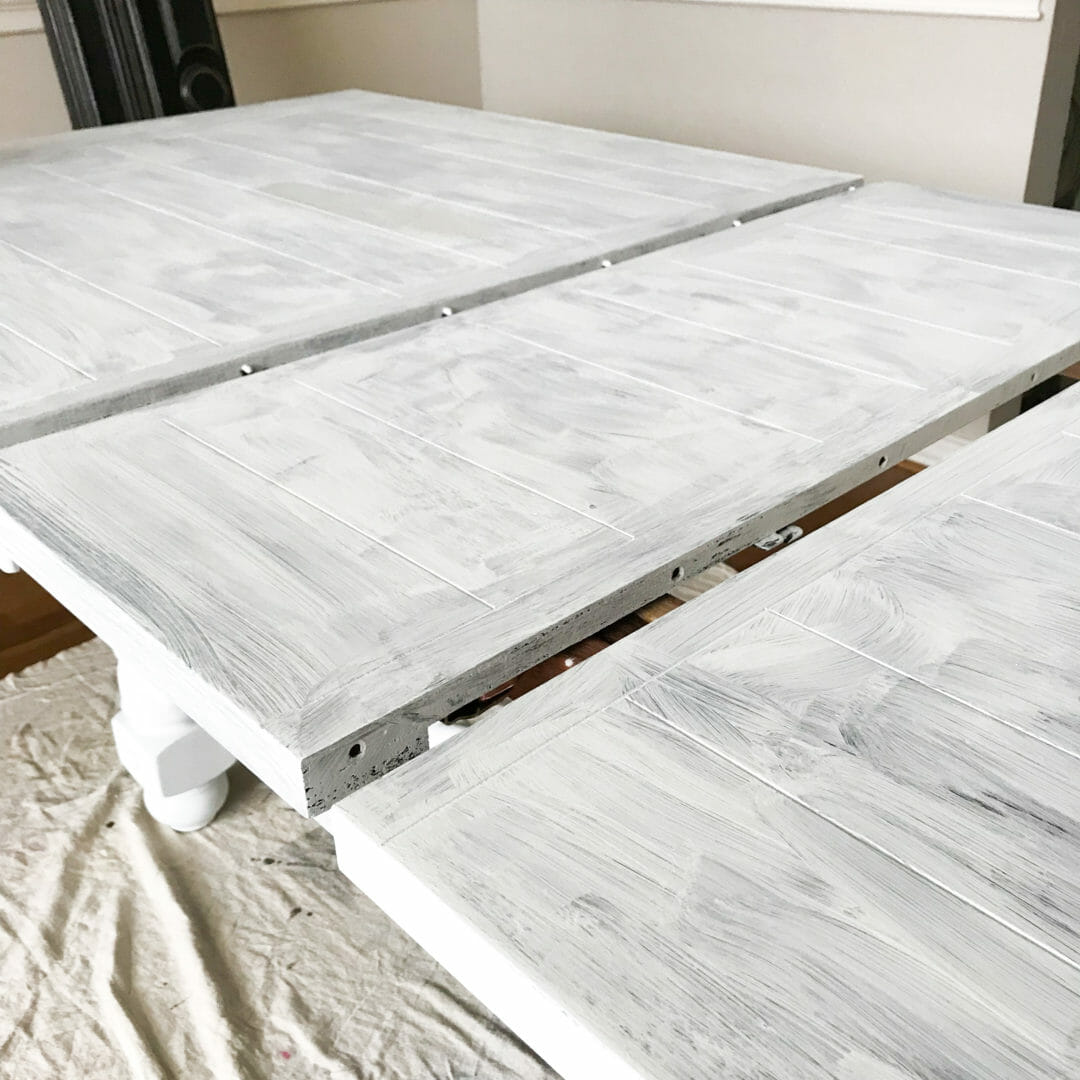
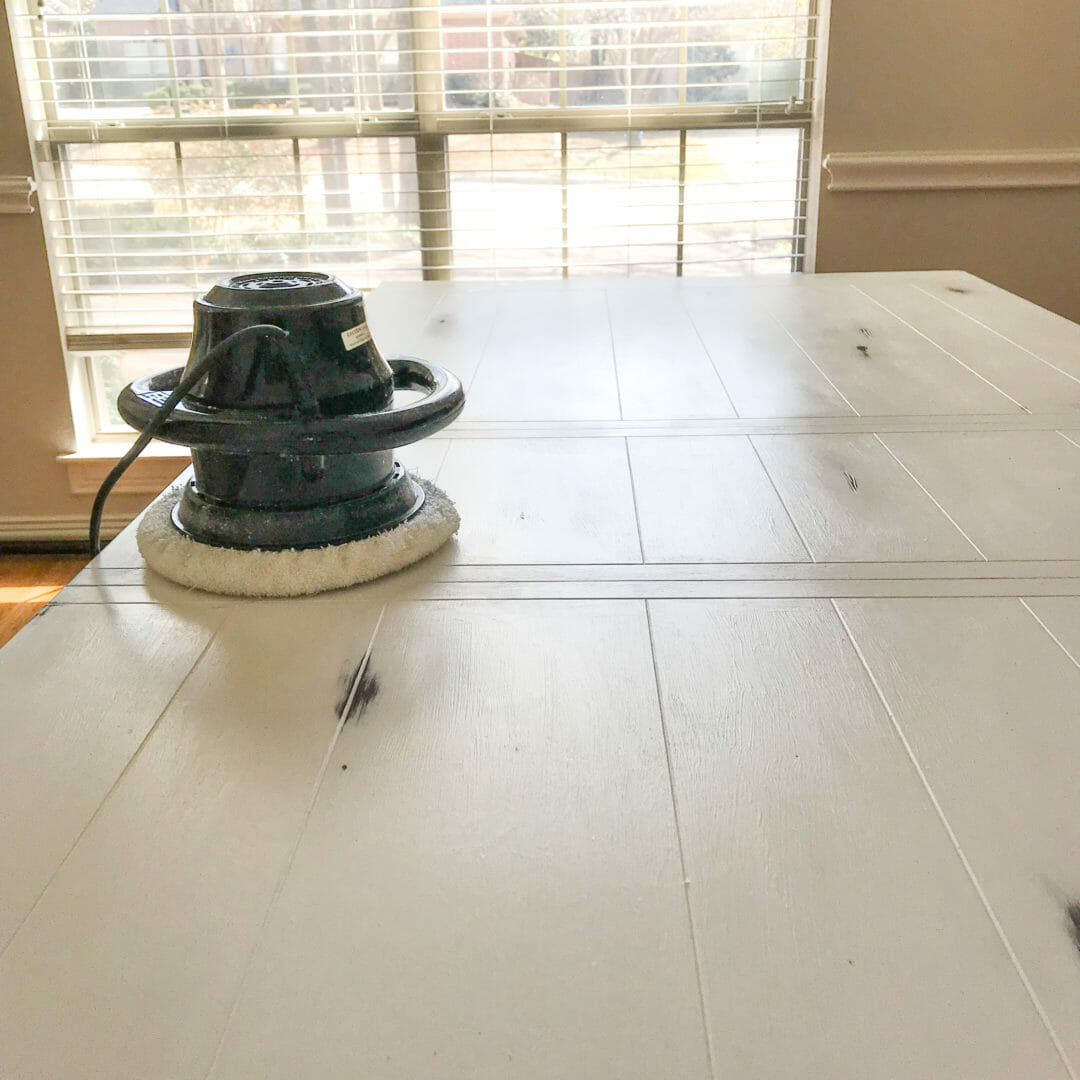
Coat #1 Above
I feel the Annie Sloan brand goes on a bit smoother and maybe a tiny bit thicker but this one did pretty well. The picture above is after the first coat. The picture below is after the second coat. It isn’t quite covered enough so I went ahead and gave it a third coat. Note: The can says “One Coat Coverage”.
Coat #2 Below
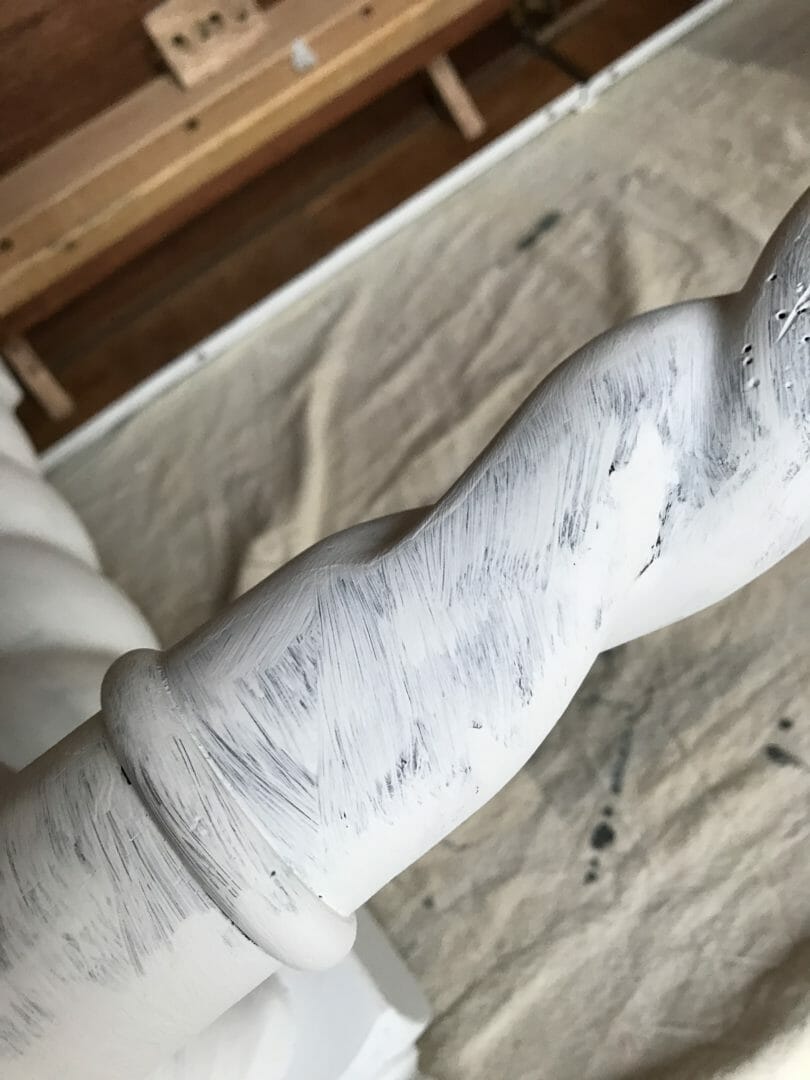
Time to distress it.
After the third light coat, I distressed it just a tiny bit. That is super easy. Use a fine grit sandpaper and go to town. I chose to sand the table a bit heavier on the edges. The table top and legs only got a few spots done. Warning – the sanding produces a ton of white dust. And I mean a ton. It’s like you dropped a bottle of baby powder and the lid popped off.
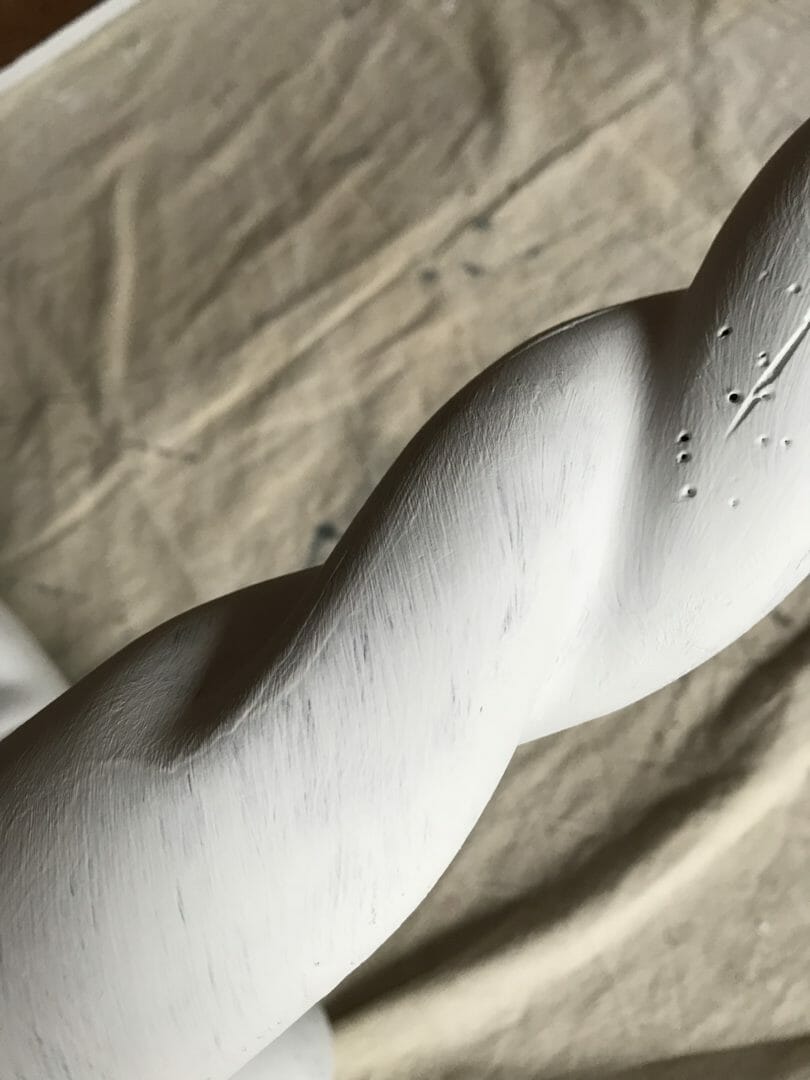
Time to make it shine!
After the distressing/sanding and clean up, I used the Annie Sloan Clear Wax since I had it left over from previous projects. The Mister saw what I was doing and asked why I wasn’t using the car buffer. Why hadn’t I thought of that before my elbows were tired and I’d worked up a nice little bead of sweat on my forehead? Well it worked great! I will never hand buff again. It smoothed everything out and it looks so professional. As a matter of fact, our neighbor came over and thought it was a new table! Mhmm, that’s me, Professional Chalk Painter/Distresser/Buffer. 🙂
So in conclusion and in my now “professional” opinion (ha ha), I am very pleased with the out come. And considering the Rust-oleum Chalked Paint was $20 and is about 1/3 the cost of Annie Sloan, I’ll be using the Rust-oleum every time. By the way, I used almost a full quart to paint the table with 3 coats. Not bad. I now have a new table for 20 bucks and cheap labor!
Now that I finally got the table painted, it’s on to decorating! Woo hoo! If you have any questions, let me know – I’m here to help.

Your table looks fantastic! The twisted details on the legs are so pretty and the texture of the chairs is perfect.
Author
Thanks Stacey! Huge improvement that’s for sure. 😀
Your post came just as I was waffling on whether or not to see or paint my 45 year old cherry Queen Anne table and chairs. Your table looks great and your hubby’s idea to use the car buffer was brilliant! Bravo!
Author
Ha ha. I’ll tell him. 😉 What did you decide to do? I think the shape of a Queen Anne table with chalk paint would be beautiful! Thanks for visiting. ❤️
It turned out great! The second time I needed to refinish my table and chairs, I chalk painted them! (I made my own). I stained the table top but the rest got painted. Wish I’d done it long ago! I’ll have to find a picture.
Author
That sounds very nice Cecilia. I can’t fathom making my own chalk paint. You’re awesome! Hope you find a picture. I’d love to see it. 😀
Love it Cindy!!! It turned out amazing. And I love the chairs you picked for it. They go so well together. 💕
Author
Thanks Yami! That means a lot coming from the Queen of painting and DIY! ❤️
I love it! Can’t wait to see the finished room! laura
Author
Thank you Laura! Slow but sure on the rest. I hope to be finished by Easter. 😊
Author
Thank you Laura. Slow going but hope to be finished by Easter. 😊
Cindy it could not have turned out better. I had to put three coats on my table and chairs also but it was well worth it. I love painting and distressing even more, if we lived close we could start a business getting old pieces redoing them and selling them. It’s so much fun to use what you have and make it look totally different. You rock girl
Author
Oooh Barbara that sounds fun! I wish you lived closer too. Think of all the great pieces we’d find! Thanks for the sweet compliments. ❤️
Love your results!
Author
Thanks Kathy!
Your table looks great, and I love the car buffer idea. I may have to borrow that idea, I wonder if my FIL has one to borrow?
My dining room table is a family heirloom in solid Mahogany, which will NOT be painted, at least not my me; my grandchildren may feel differently when they get it. It is from one of my Great-Aunts, and I have the sideboard and china cabinet too. The chairs on the hand are falling apart and I have glued and reupholstered them for the last time. It is time to look for replacements. Since part of my heart is an island girl, I call my style, British Colonial, with a bit of farm girl and 50s pink glam. Yeah I’m eclectic! HaHa!
Author
I totally understand about not painting that fabulous table! I wouldn’t either. And it sounds like you have a great eclectic style. It took me quite a while to figure out my style. Thanks for visiting Josephine! 😊
What a difference! It looks great! 😊
Author
Thank you Laura!
I gazed at the first picture for a while, before I figured out it really was your dining room table! I guess I haven’t been over since you got new chairs. My first thought was “oh my gosh she didn’t really paint that table!”. Obviously, as usual I was wrong. It is so you! I can’t wait to see the finished product. And as usual The Authority figured out a way to make it easier. I bet there’s a bunch of DIYers that will thank you.
Author
Of course it was The Authority. He always says laziness is the mother of invention. This time for sure, I appreciate the invention intervention. 😉 And I guess you need to come visit! Love you
I love how it turned out! I actually bought a sample pot of that exact type of paint in “serenity blue” today to give it a go after I found out how expensive the Annie Sloan stuff is! I’m glad there are other brands out there competing with a quality product to help keep prices lower. Good to hear you had a good experience with the paint!
Author
I’ve used the chalk spray too but didn’t find that to cover very well. And I’ve used probably every brand name chalk paint out there and feel Rustoleum has a great product. Anyway – That color sounds dreamy. Hope you post what you paint on your blog so we can see it! Thanks for visiting Kelsey! 😊
Your vision for your dining room is turning into a beautiful reality.
Author
Thanks Carol! I’m the turtle these days but need to be the hare if I’m going to get it done by Easter! 😊
I know firsthand how much work painting a table that size can be. Let me know how you feel the Rustoleum paint holds up compared to that “other brand” you mentioned. 😉
Your table is gorgeous!
Author
Thanks Lisa! I’m kind of afraid if we eat spaghetti and drop the sauce it’s going to stain. Hope the wax holds up! I wonder if putting on multiple coats of wax would help. Hmmm. I’ll keep you posted! 😉
The table looks absolutely gorgeous! Bravo!!!
Author
Thanks Laura! I appreciate that. ❤️
Cindy,
Ok, I have a really dark dining room table that I’m always covering with tablecloths for a blogpost. Your paint job now inspires me to rethink my table! Your project turned out amazing and you must be super happy with the results! Thanks so much for sharing it over on our Friday Friends Parade Linky Party!
Author
Thank you Janine and YEP – I’m super happy with the results. I cannot believe it took me 8 years to muster up the courage to do it! Glad you’re inspired. Hope you take the plunge and paint yours too. BTW, I love the new FFPLP – such great inspiration. Thanks for visiting my blog. 🙂
That is one gorgeous table and I don’t use the expensive stuff either. And I have to agree with your neighbor Cindy you are a professional because this baby looks brand new!!
Author
Thanks Mary! That means a lot. I am really lovin it!
It looks so awesome Cindy. I’ve used a lot of chalk paints but never Rust-O-leum. It’s one of my favorite spray paints! So why wouldn’t I love their chalk Paint? As for the buffer, The Hubs bought me a buffer a few years ago. Life changing!!!! LOVE your table. It’s beautiful!
Author
I agree – that buffer is a life changer! And for the price, the Rustoleum paint is so worth the money. Thanks Tammy.
Author
Thanks so much Tammy. You can not beat the price of the Rust-oleum Chalked paint even if you have to use an extra coat. And you are so right, that buffer is life changing! Happy crafting!
Do you put any protection coverage on it after you wax it?
Author
The wax is the protection. The more you put on and buff the better but usually you don’t need more than 2 coats. Just go by the directions of the brand of wax you chose. I only did one coat and it works great. You can see in the post link below how I take care of any smudges on the table. Hope that helps. Thanks for the visit Wendy.
https://www.countyroad407.com/rust-oleum-chalked-paint-review-update/