
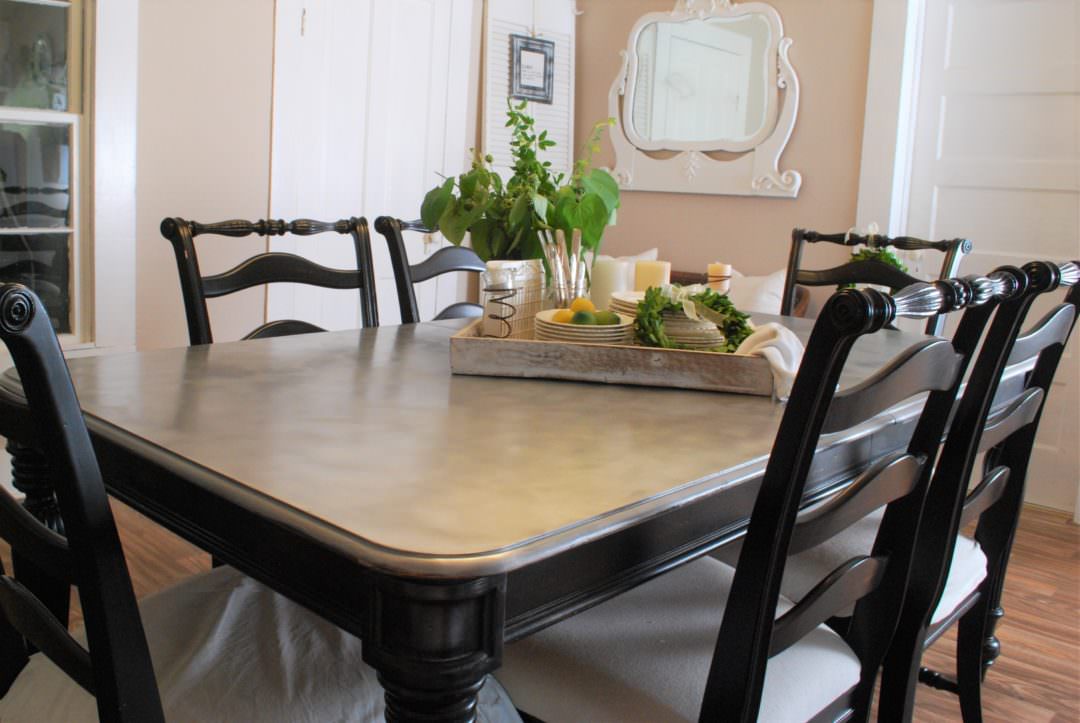
I didn’t like the table and chairs that were originally in the farmhouse. It was ugly, sat only 4 people and the chairs were uncomfortable. Uh yeah, no thanks. This gave me the opportunity to go through my furniture warehouse. I know not many people have a Home Staging business with a warehouse full of furniture, but I did. I’ve sense sold it all but ooh wee, it made for some great redesigns. And it made for a great low cost, low effort DIY galvanized looking table top and chair makeover!
I see it like this – God knew when he prompted me over 10 years ago to get certified in Home Staging and Redesign that I’d one day branch out into furnishing vacant and model homes. He also knew the Mister wasn’t going to purchase a bunch of new pretty stuff for this old inherited house and I’d need/want different furniture. So boom bam, free furniture from my warehouse!
The set I chose has gold fabric on the seats and a dark stained top. Not ugly but traditional and heavy looking. I thought about painting the entire thing white but that would have put the Mister in a tizzy. He doesn’t agree that white paint makes everything fresh and pretty.
Steps for a DIY Galvanized Looking Table Top
First wipe the top with Klean-Strip Mineral Spirits or any other paint cleaner. You don’t have to strip the stain off, just make sure there isn’t an oily residue left anywhere. Now tape off the sides using painters tape and plastic sheeting to protect the legs and sides from over spray.
Next, apply Rust-Oleum metallic spray paint in a circular motion. It took almost 2 cans to thoroughly cover the top. After it dried, I used Fat Paint chalk paint in the color called Mountain Haze. It’s bluish gray. I used that color because I had it left over from a previous project and was to lazy to drive 25 minutes one way to get something different.
All this was done prior to starting a blog so I apologize for not having a “during” picture. No one needs to see my hand with a spray can in it anyway.
Next step is to dip a paint brush (no special brush) into the Fat Paint then remove the excess paint by dabbing it onto a paper plate. Your brush will look almost dry. Now apply what’s left on the brush to the table top in a short crisscross pattern.
When it was almost dry, I used a cheap rough dry wash cloth and wiped it in a circular motion. Then when it’s fully dried, go over the entire top with a 220 grit sandpaper. I also used a 120 grit sand paper in some areas to give it a not-so-brand-new look.
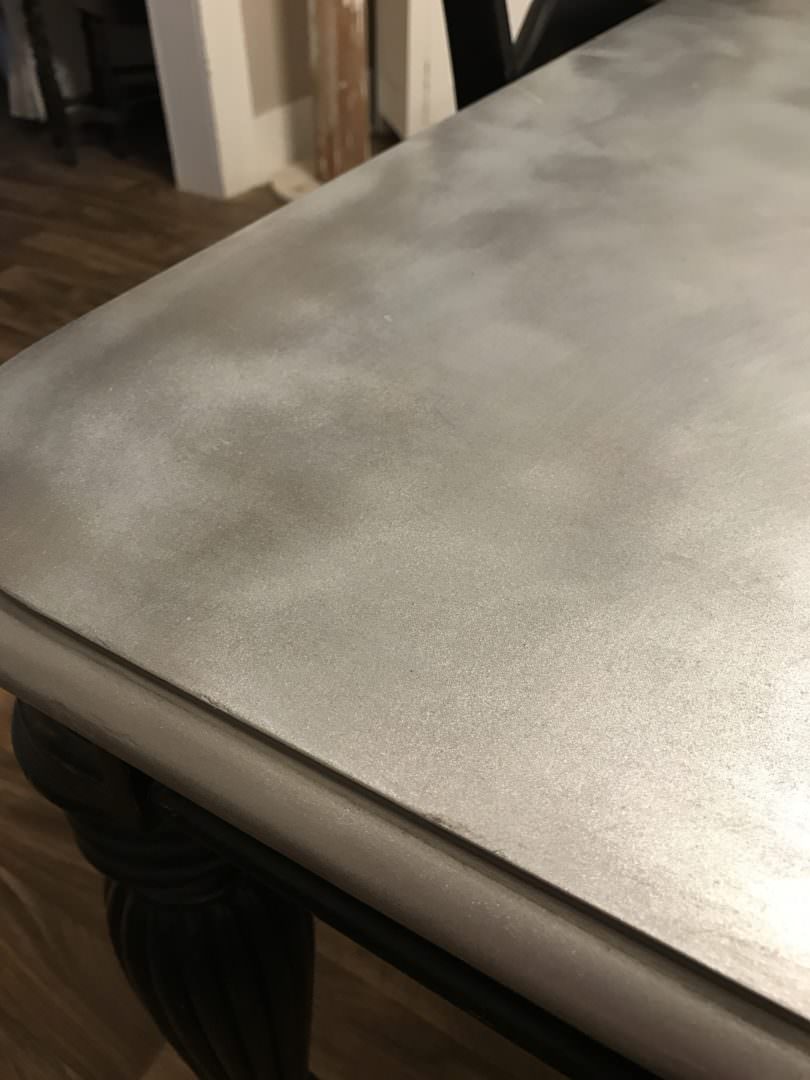
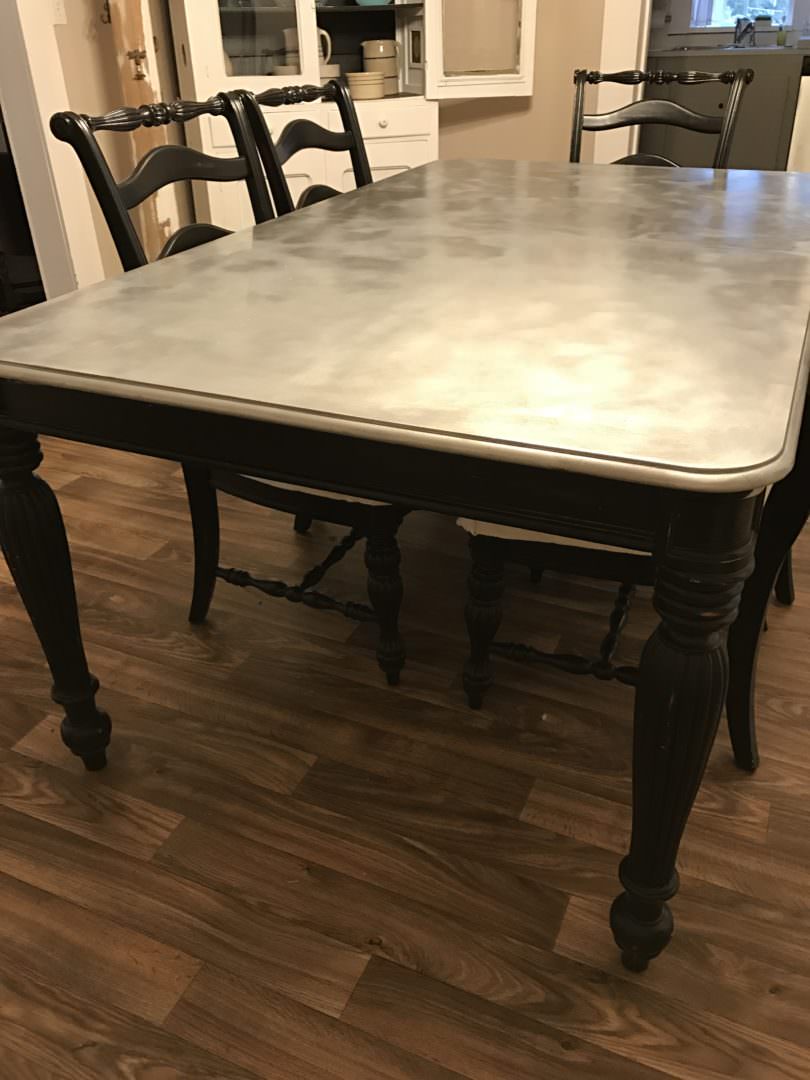
How does it look? I think it looks like galvanized sheet metal!
Chair Makeovers:
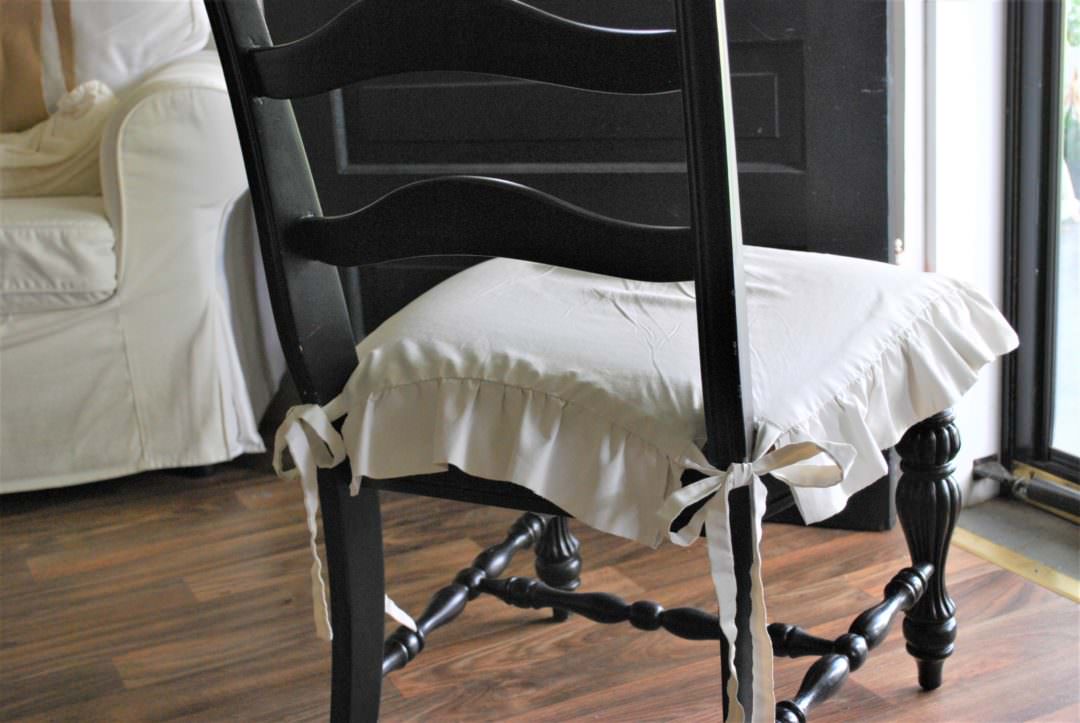
For the chairs, the plan was to sew 6 ruffled seat covers that tied around the legs for easy removal and washing. I asked for help from my sweet sister-in-law who of course said yes. Then seven little words came out of her mouth – “We’ll need to make a pattern first”. Seriously – a pattern?! My eyes instantly rolled so far back in my head I thought I was going to fall over.
I gave in and gave it a try. We made a pattern and started on the ruffle. Even Melinda (SIL) was a little annoyed at the situation. We were using her left over curtain lining. It grips and has a rubbery feel. I was so frustrated that I pooped out after the second one and decreed no more! Goodness gracious, I never knew making a ruffle was so tedious!
Obviously the other 4 chairs get a different makeover
I used a 6′ X 9′ painters drop cloth to use as the fabric to recover them – plenty for my four chairs and it’s less expensive than purchasing upholstery fabric. Straight out of the package the drop cloth is dark beige and unmanageable. I put it in the washing machine and added the normal amount of laundry detergent with 2 cups of bleach. The end result is a perfectly colored soft pliable piece of cloth.
We unscrewed the seats from the bases and simply laid them out and traced around each seat adding about 6 inches. Cut each one out then pulled and stapled the fabric back on the seats. Lastly, each one got attached back to it’s original base. Easy peasy, lemon squeezy.
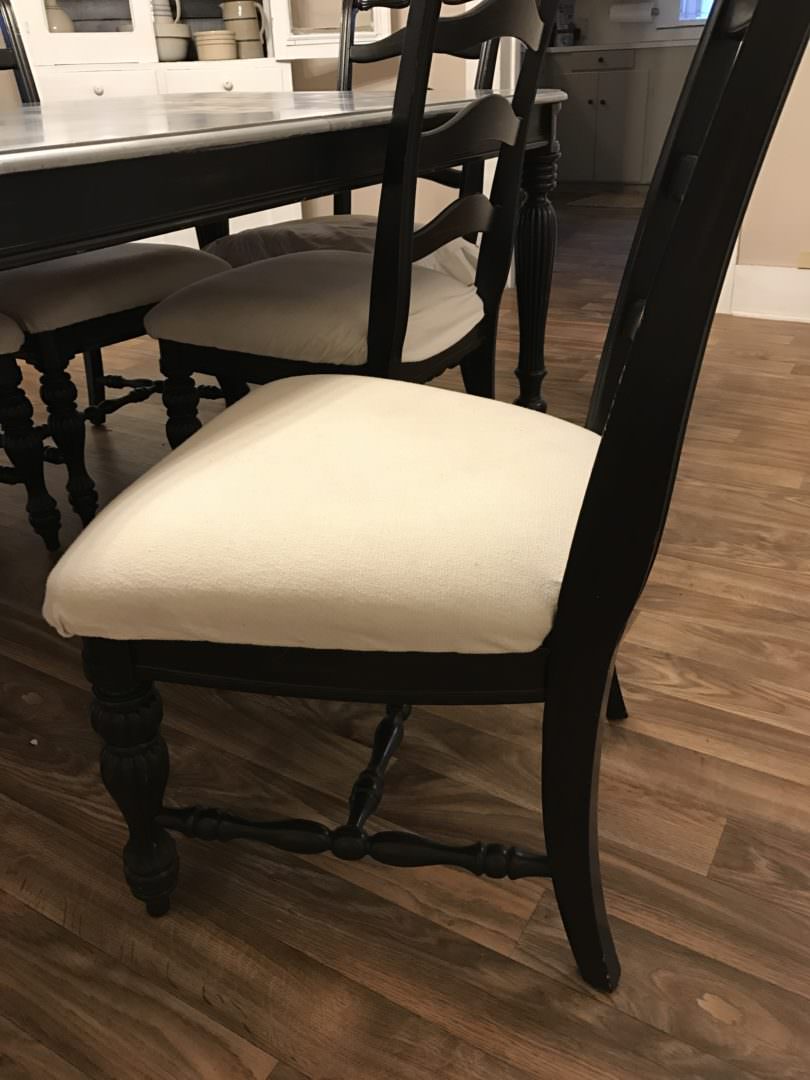
Even though this DIY turned into a weekend project, the Mister and I agree on the new look. And if the table gets a scratch, it adds character, the ruffled covers can be washed and if we ever need to recover the cushions again, we know it’s easy! 🙂
